

Detailed Guide: Interactions API Key Creation
Creating an Interactions API Key
First, you will need to log in to your Organizational Workspace in the Console.
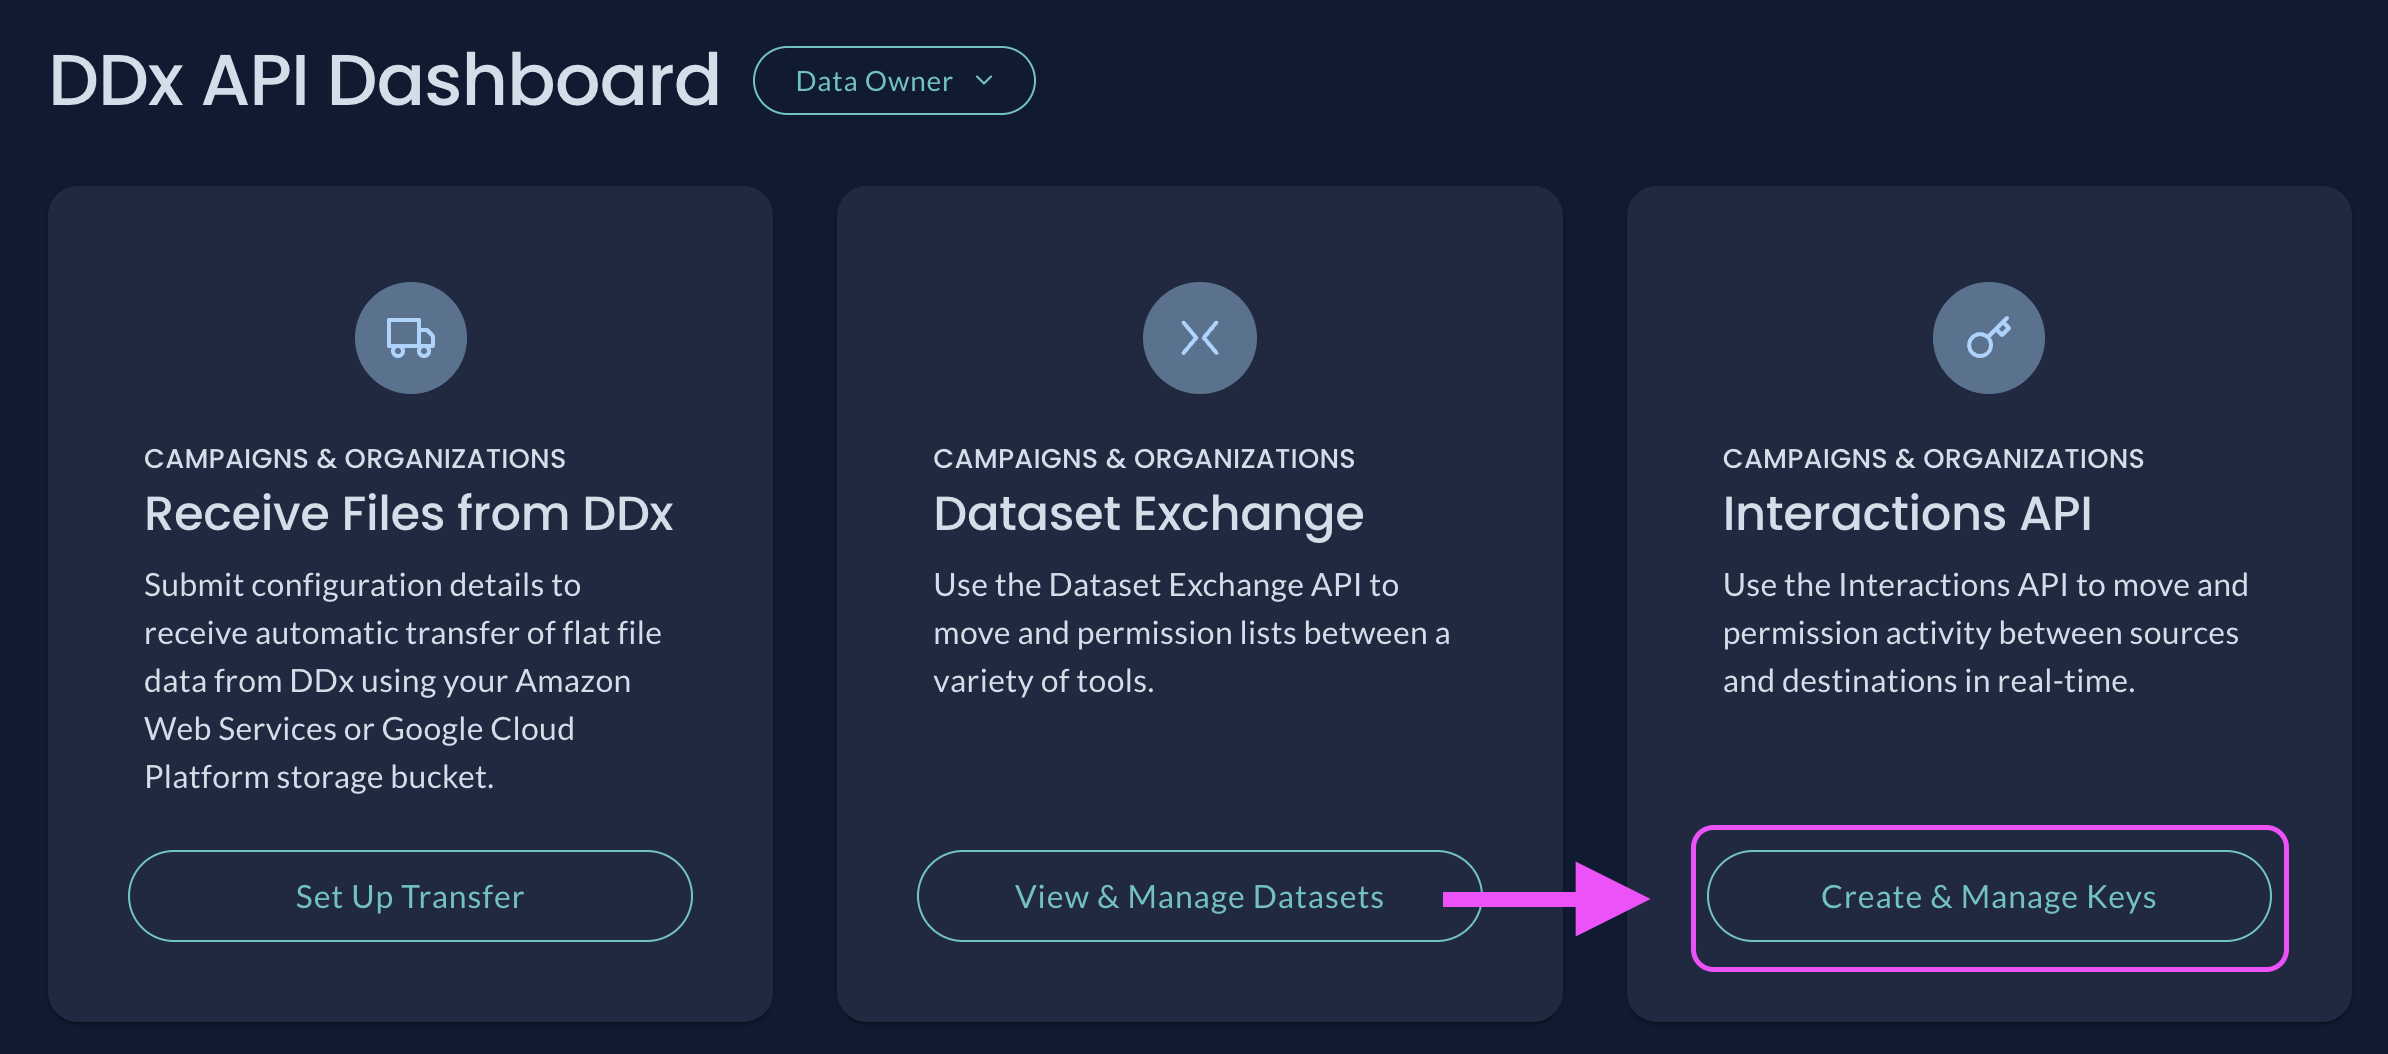
Click Create & Manage Keys under the Interactions API tile
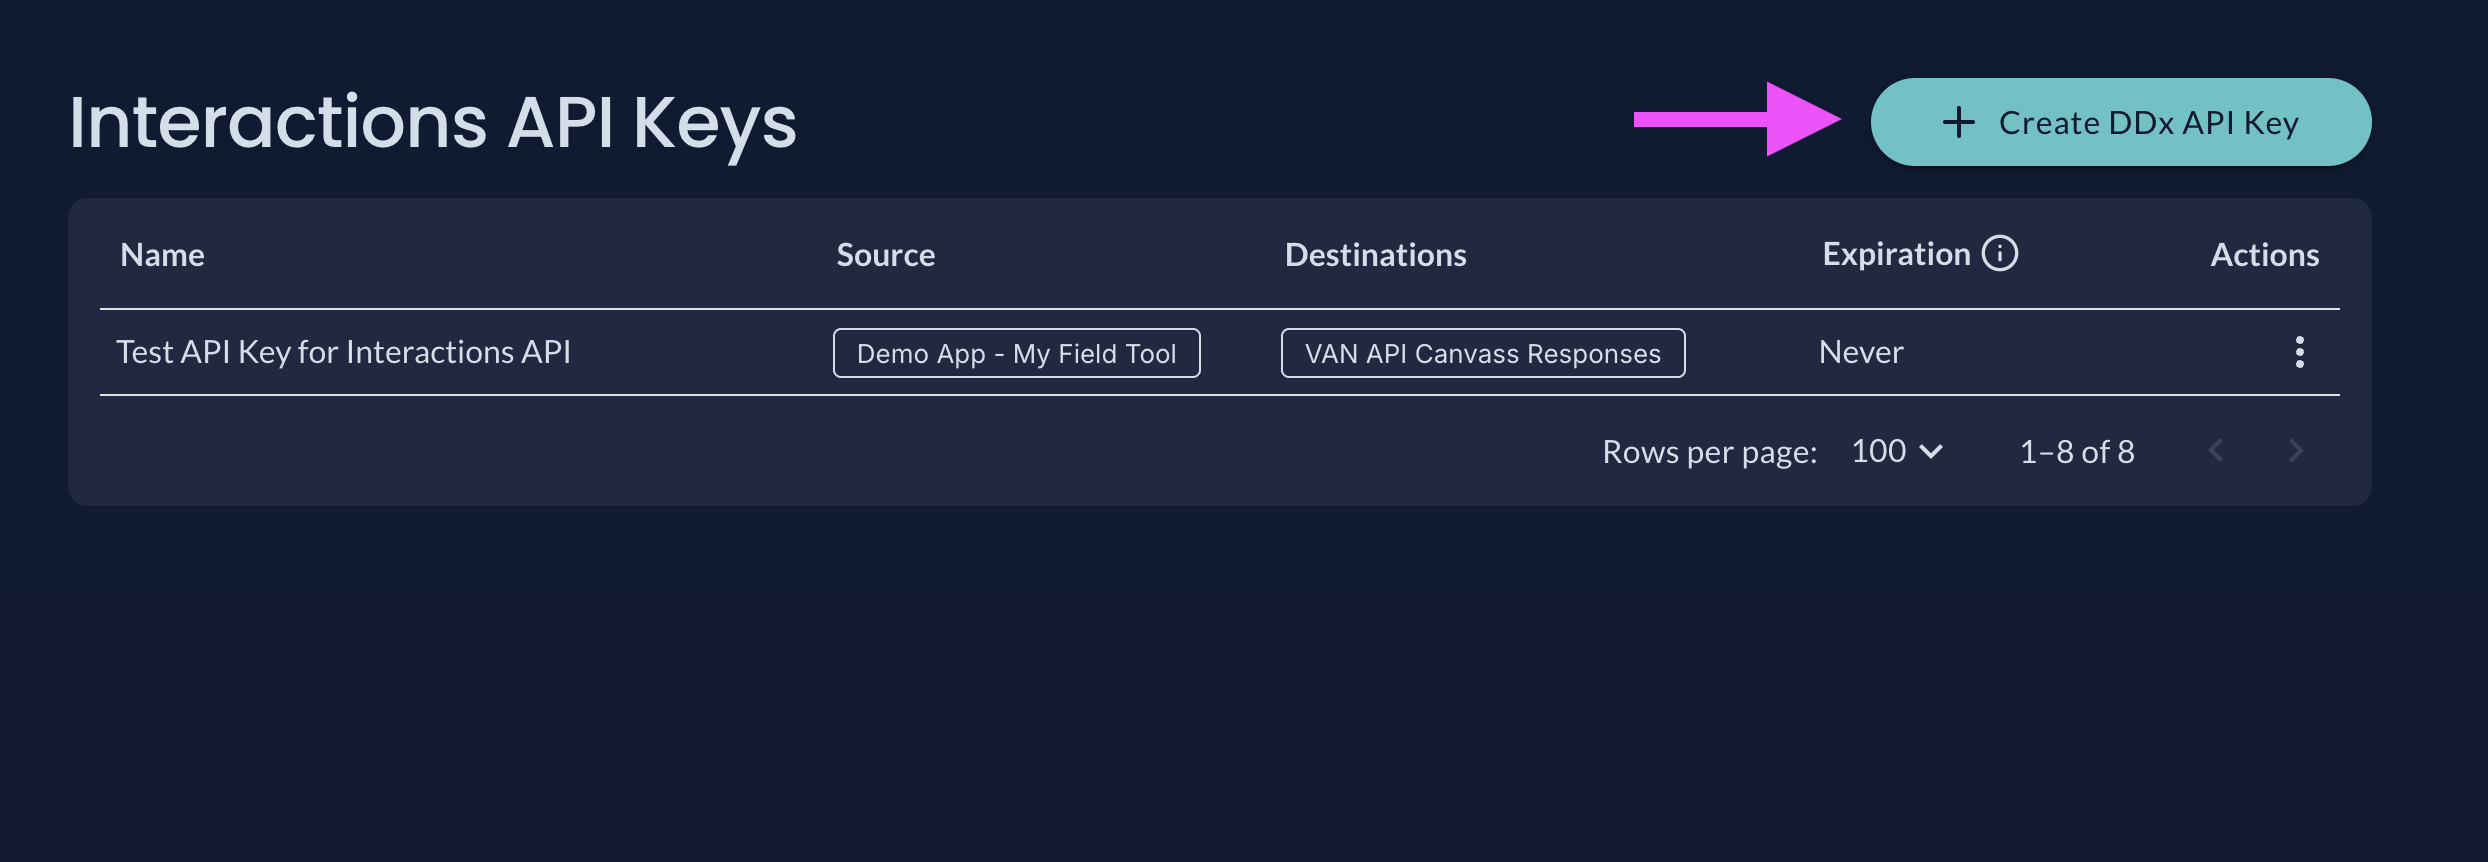
Select + Create DDx API Key button

Name your API Key
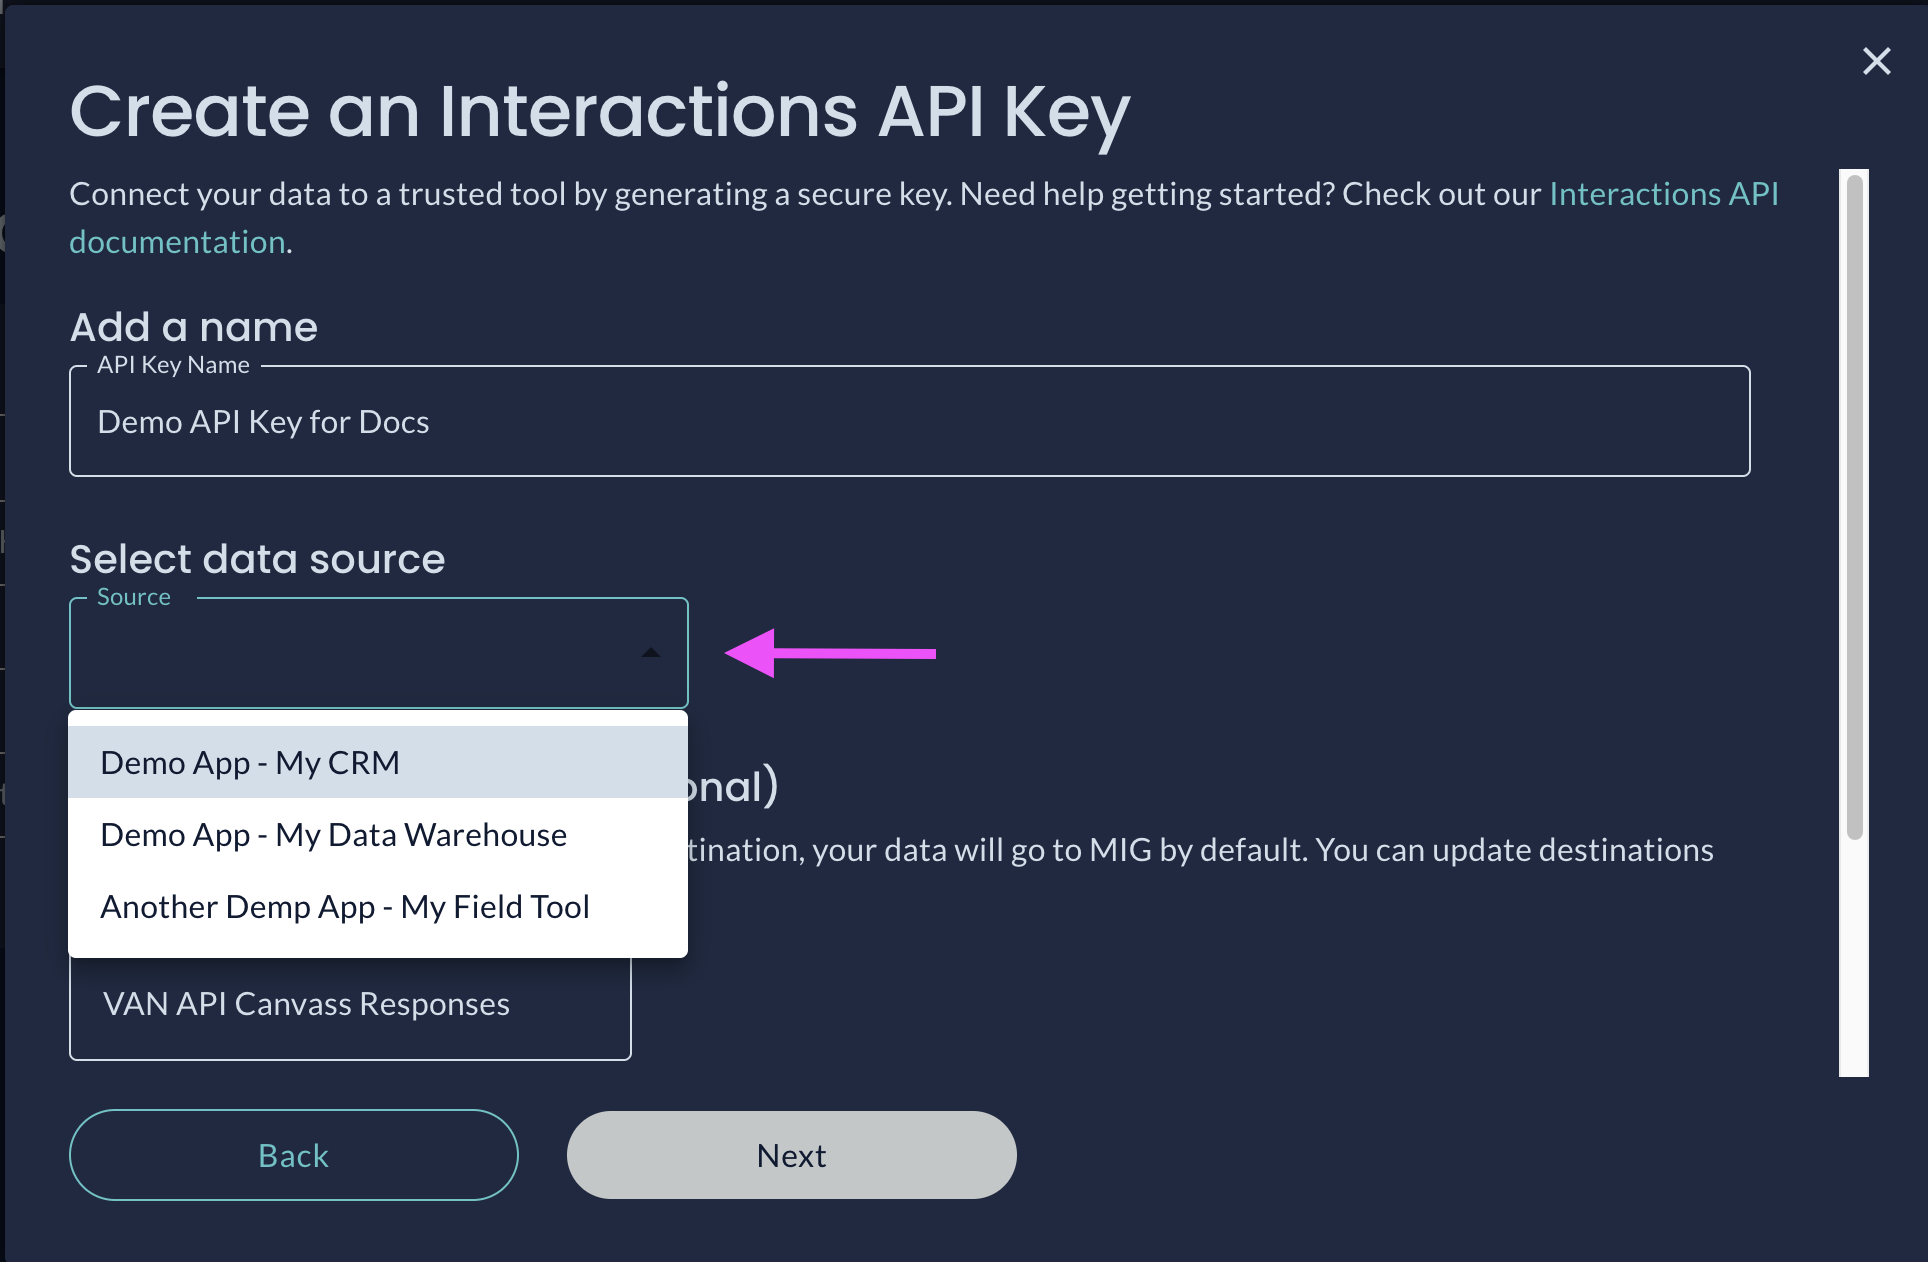
Select the Source of your data for the API Key from the dropdown menu
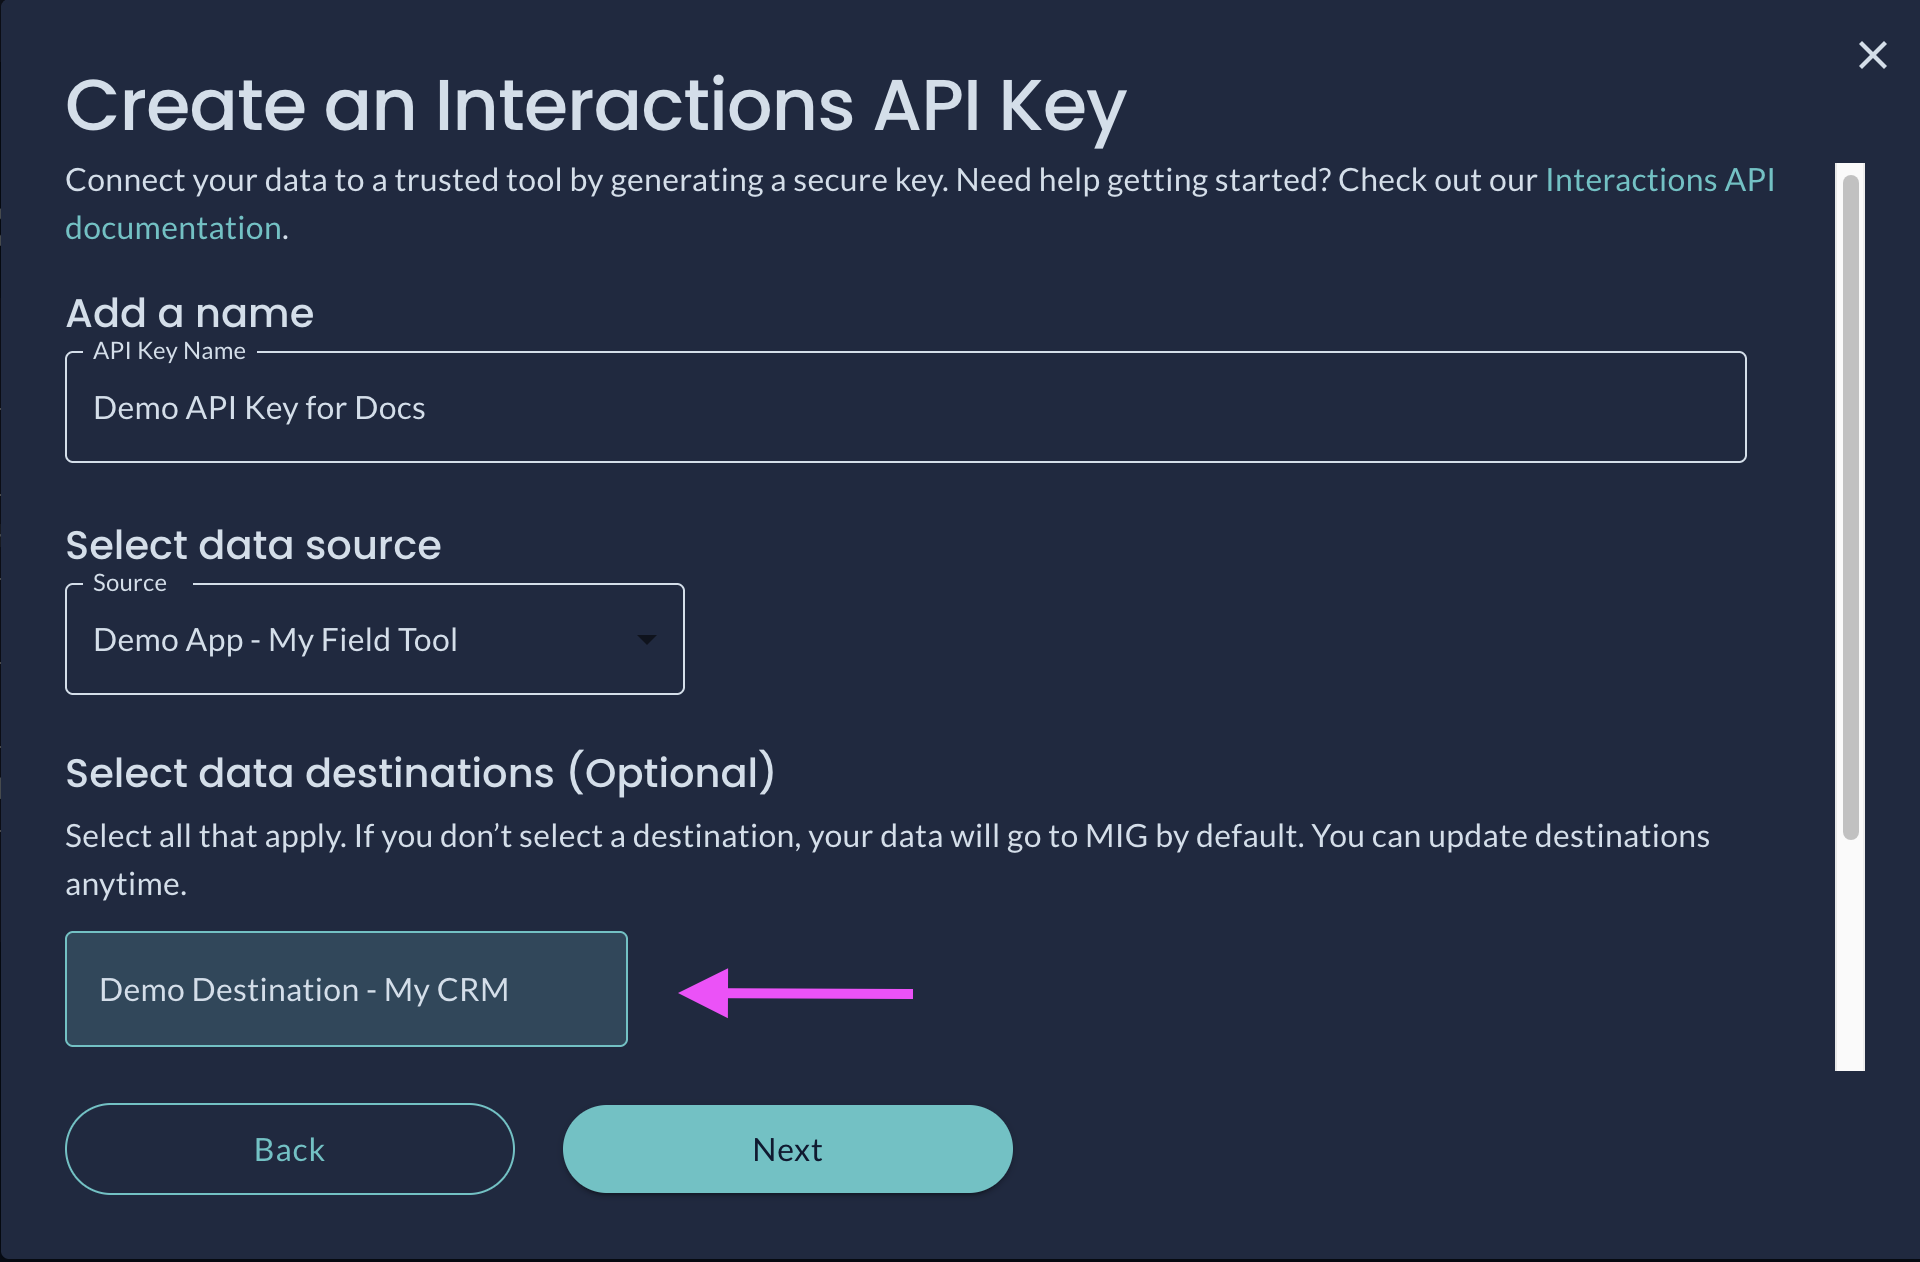
Choose the Destination(s) of your data for the API Key. These can be edited at any time
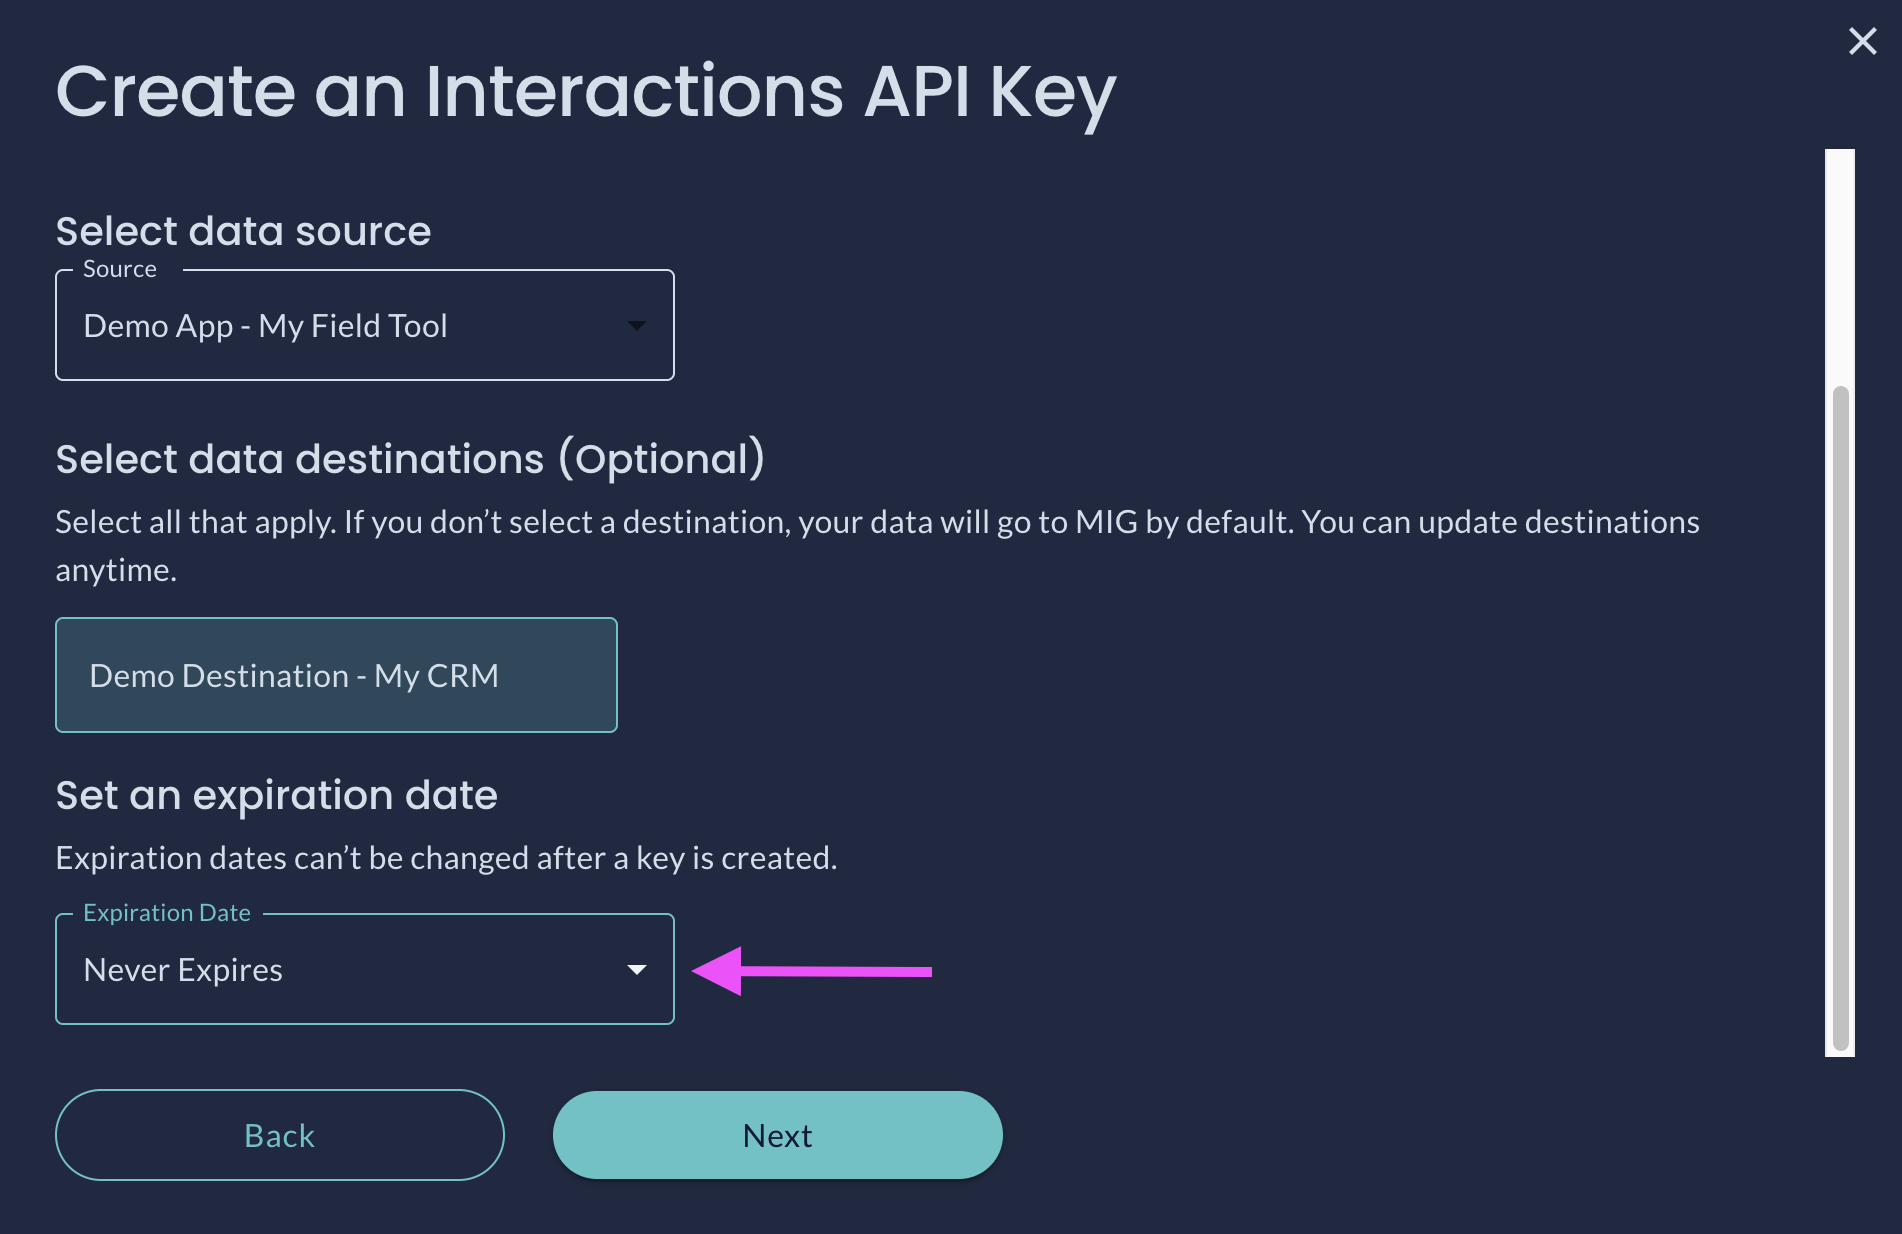
You can set an expiration date from the dropdown menu
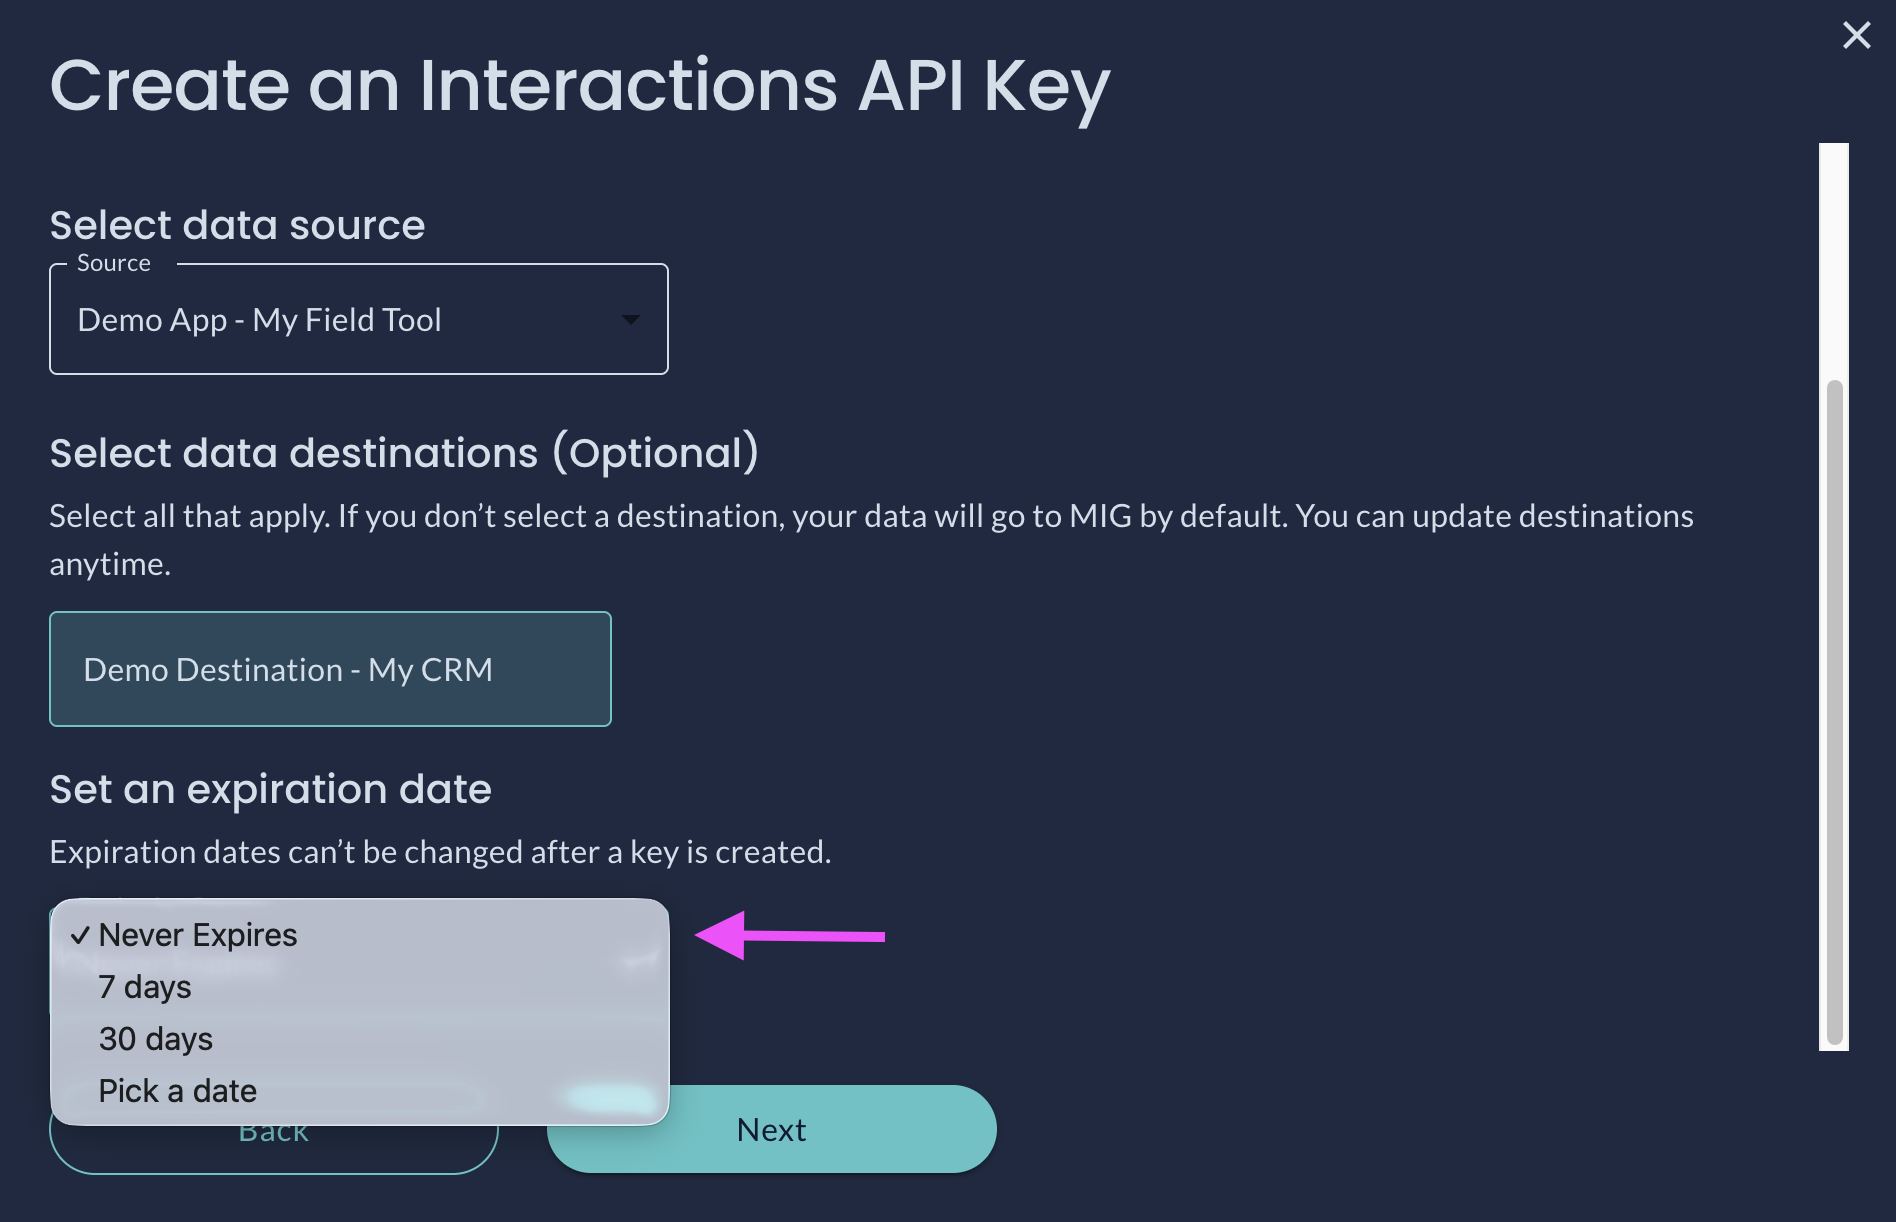
The key's expiration date can be customized when creating the API Key. This data cannot be changed after the API Key is created
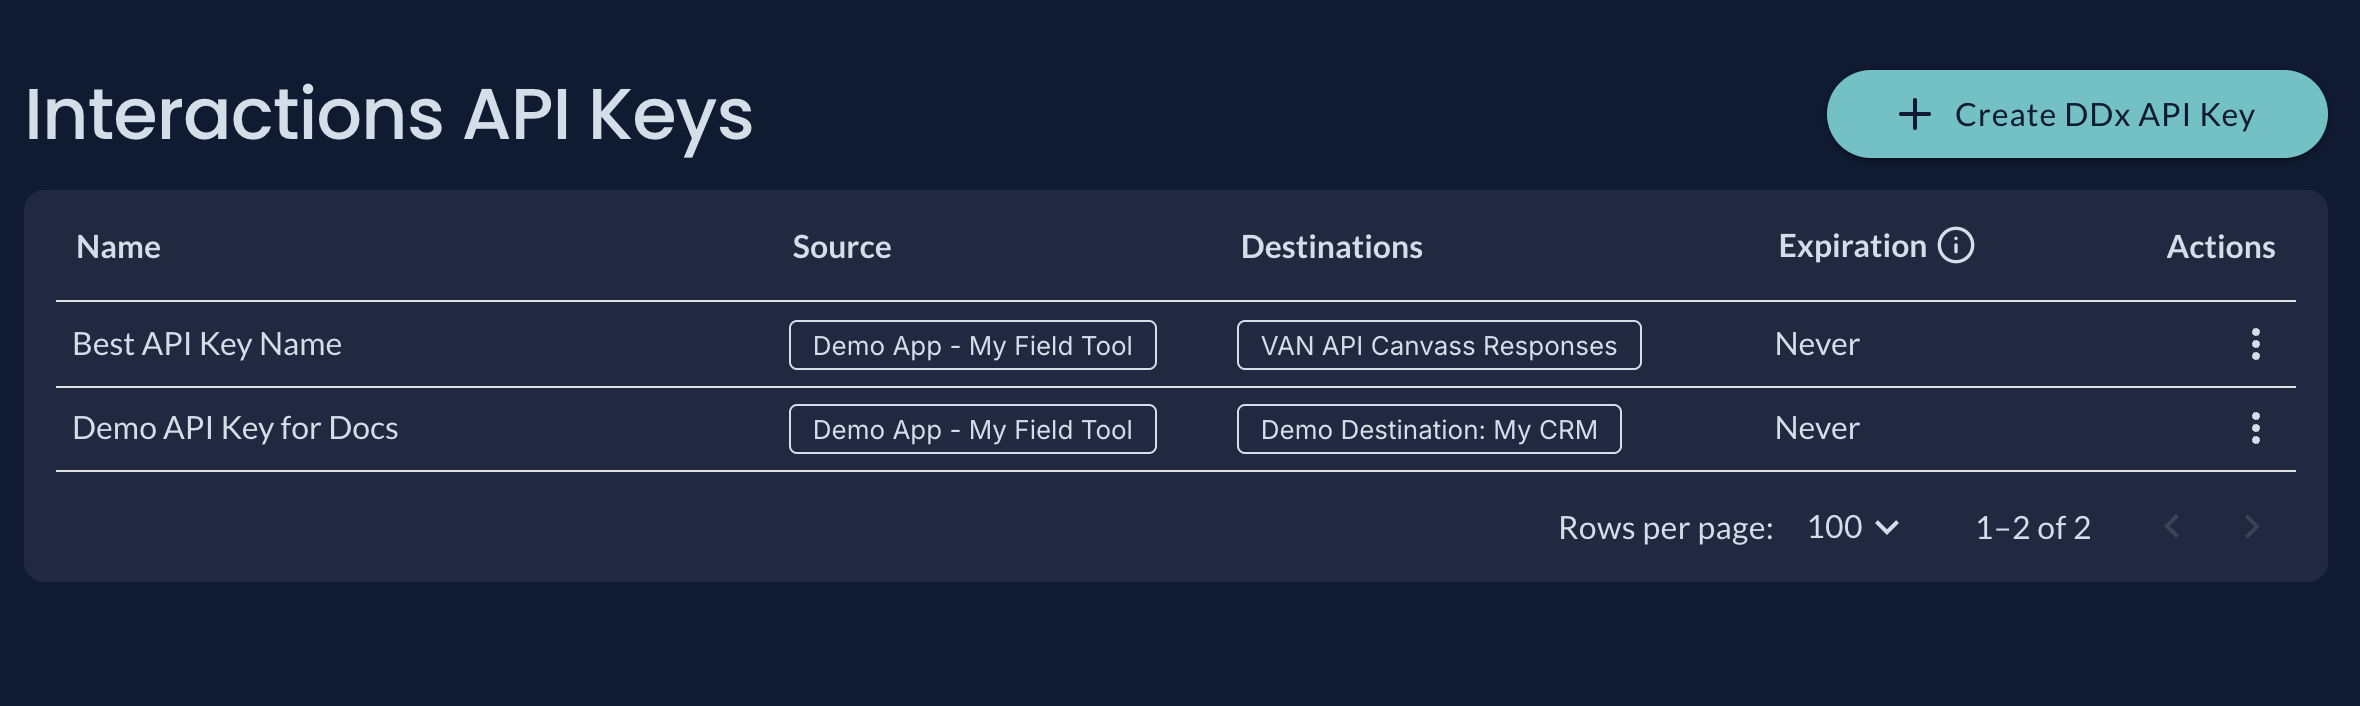
After you create your API Key you will see the new key, along with any other keys you've created, in the table
Viewing API Key Detail
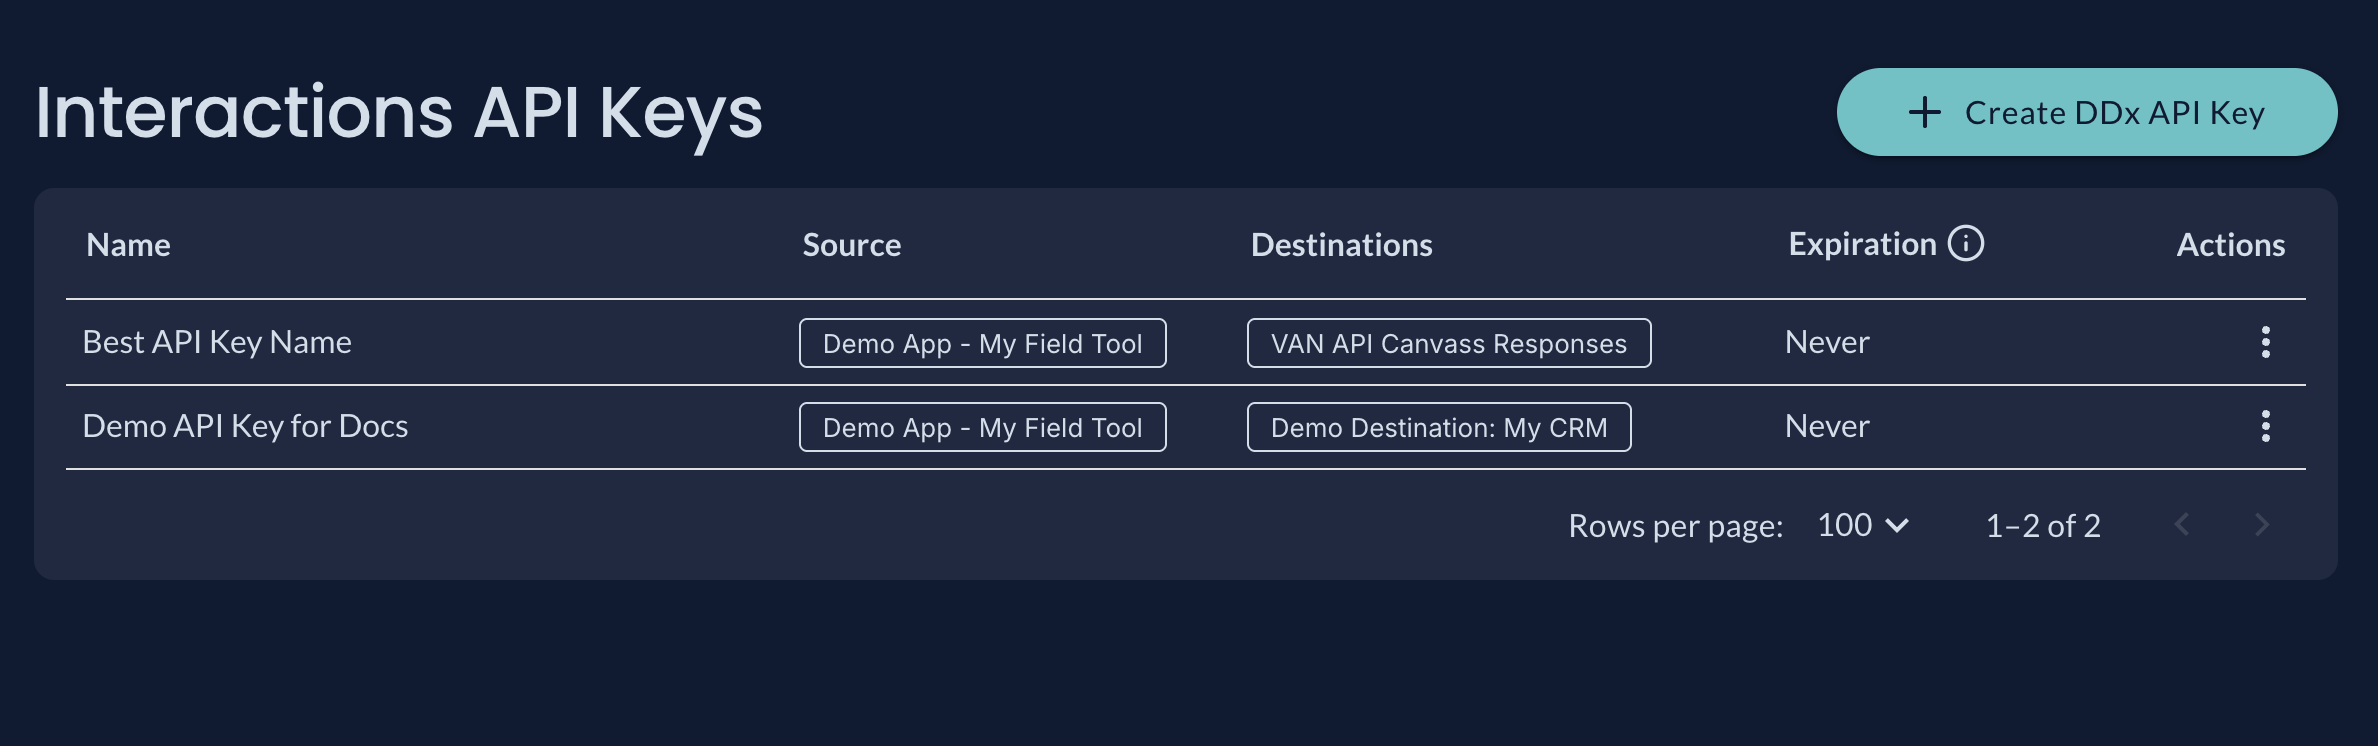
The Interactions API Keys table will show details for your API Keys including the Source and Destination(s) for each key
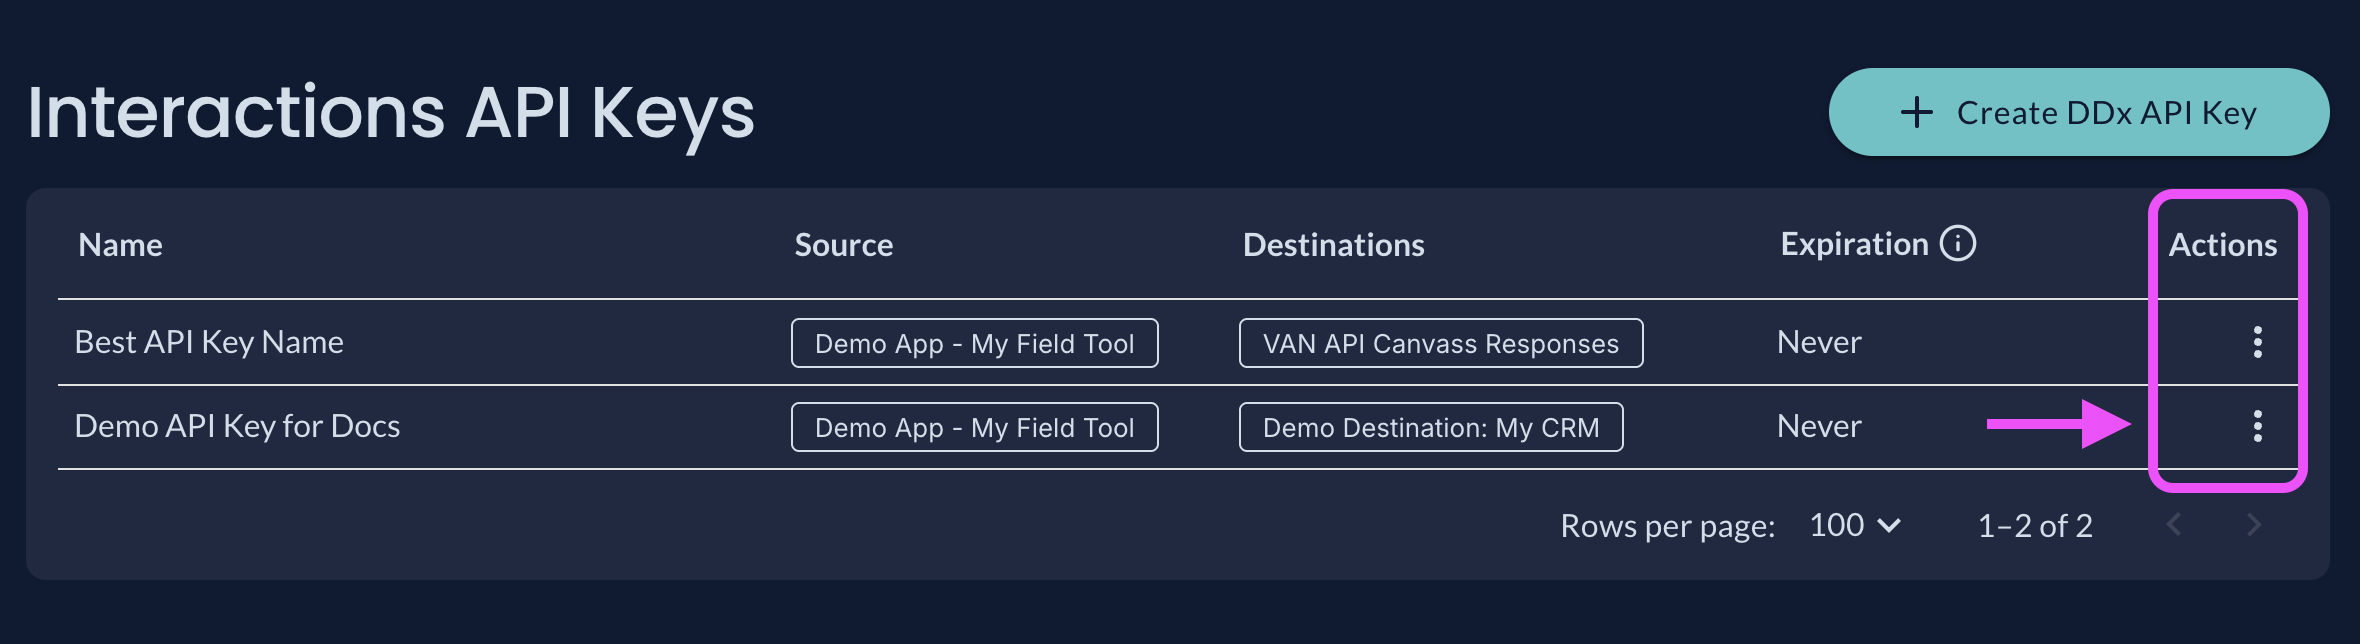
The Actions menu on your API Key table allows you to view your key's Public ID, edit, or delete the key
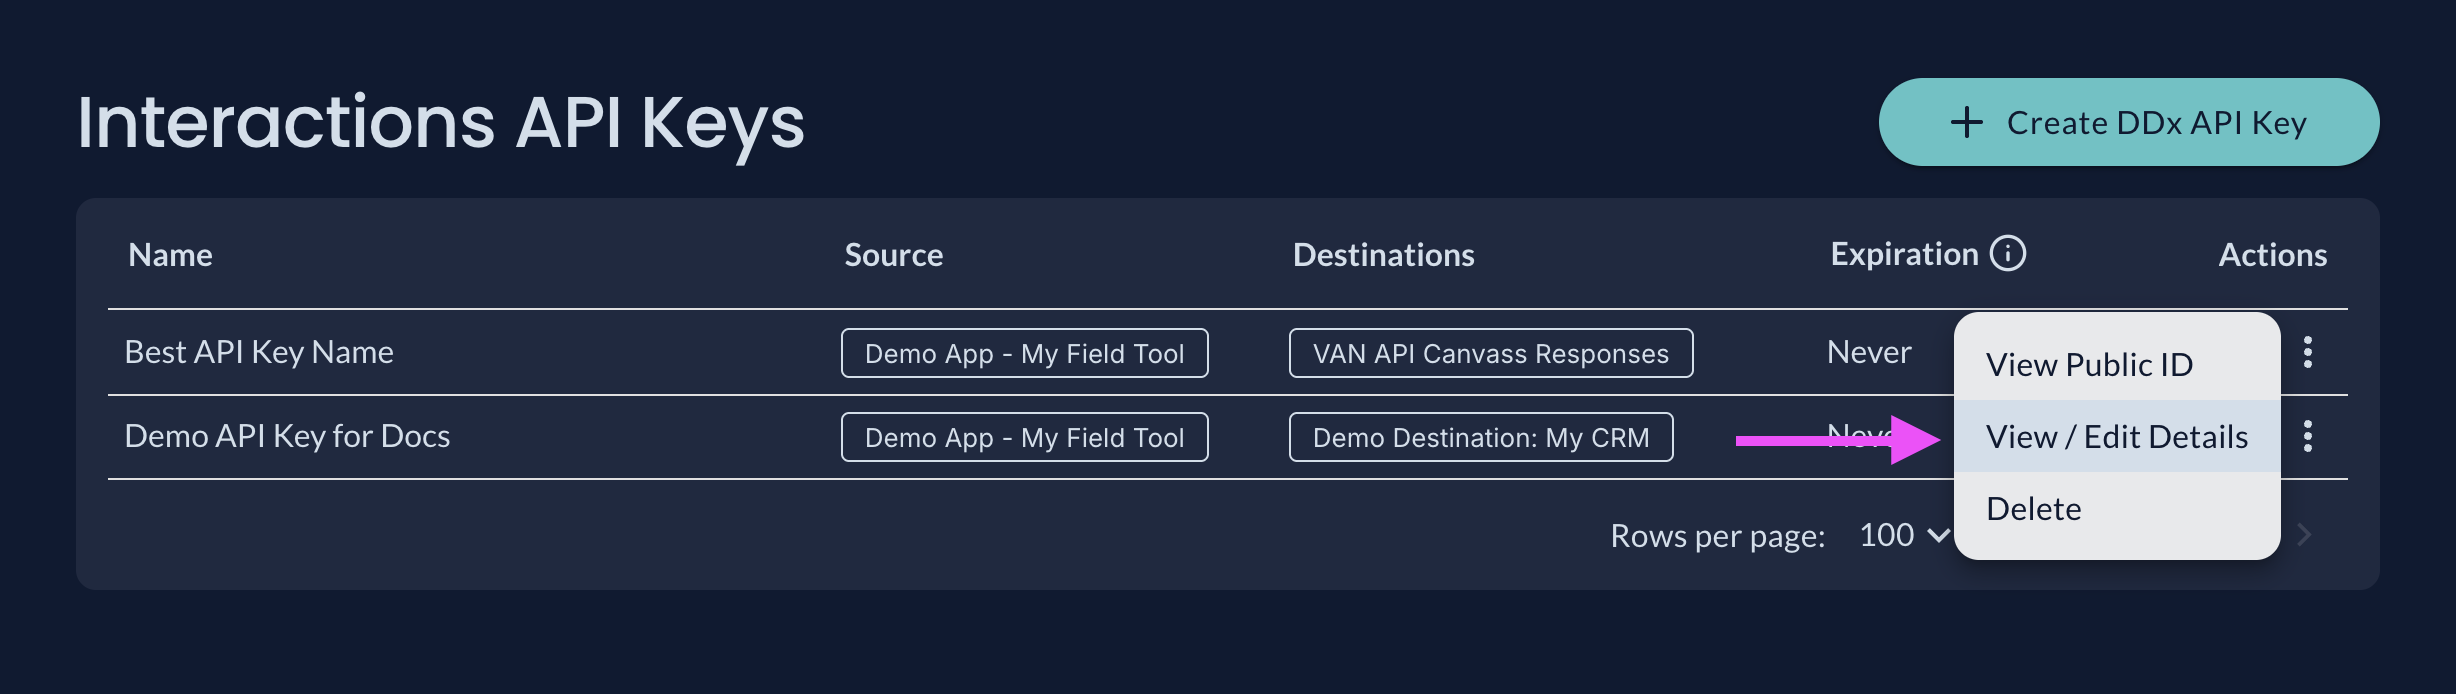
Once your key has been viewed, you can view the Public ID if needed
Deleting API Keys
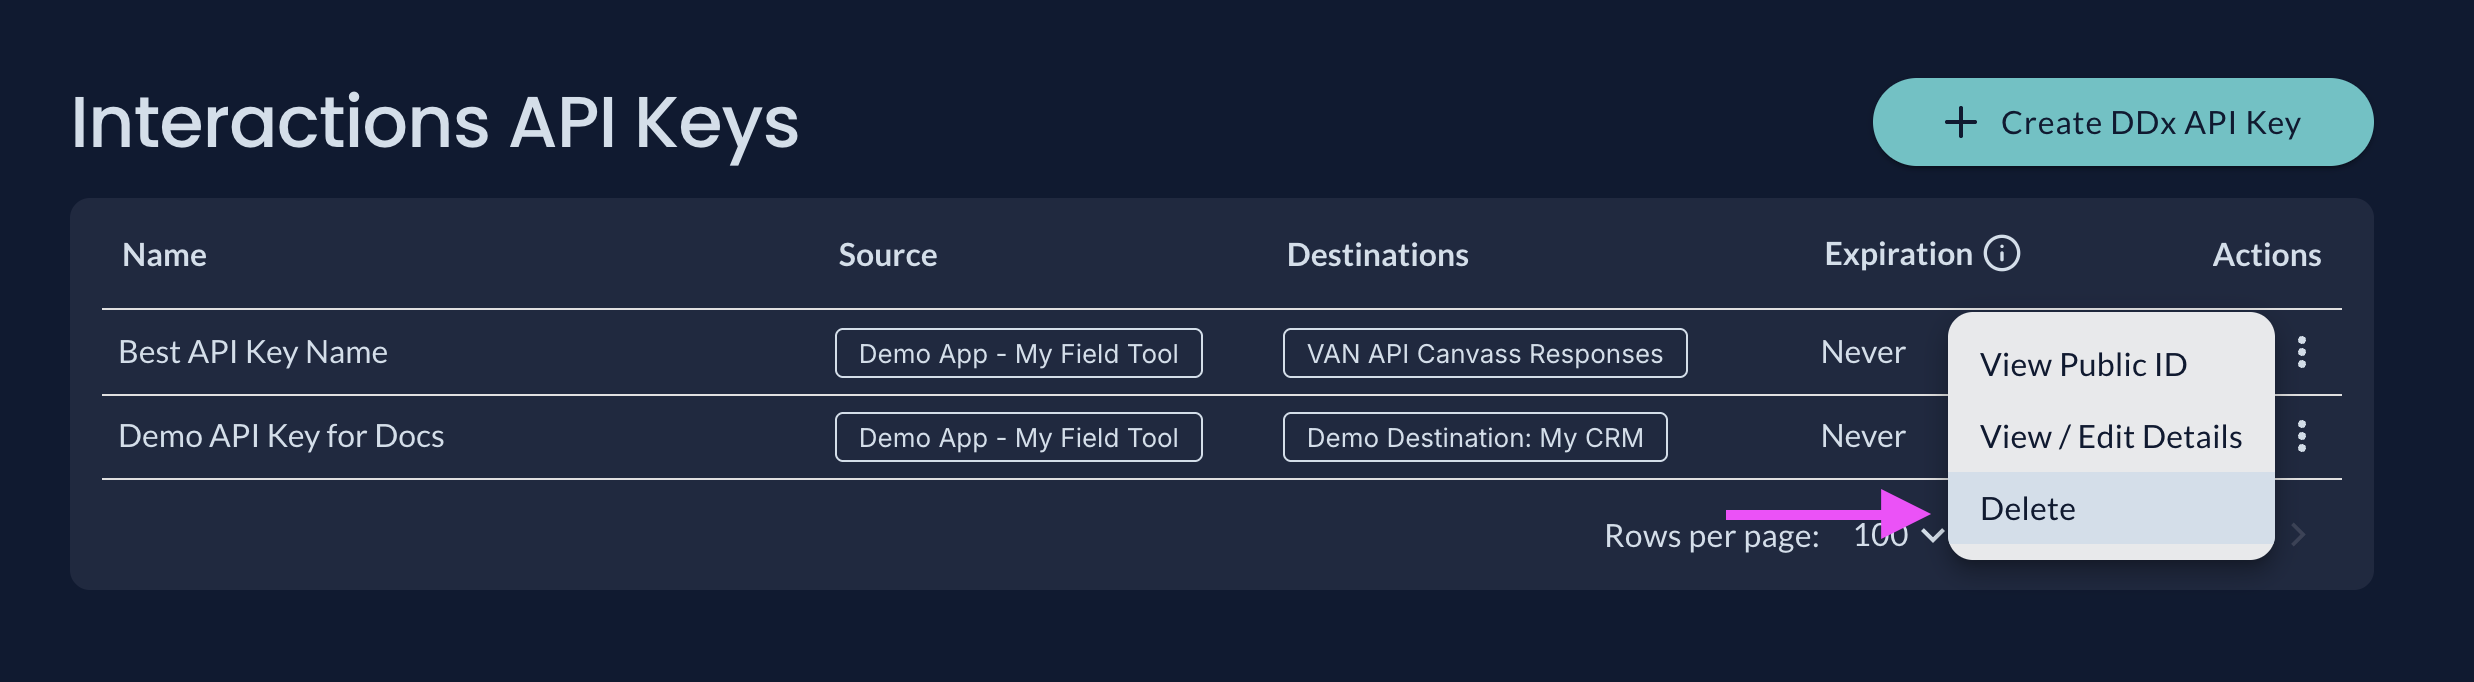
You can delete an API Key by selecting Delete from the Actions menu.
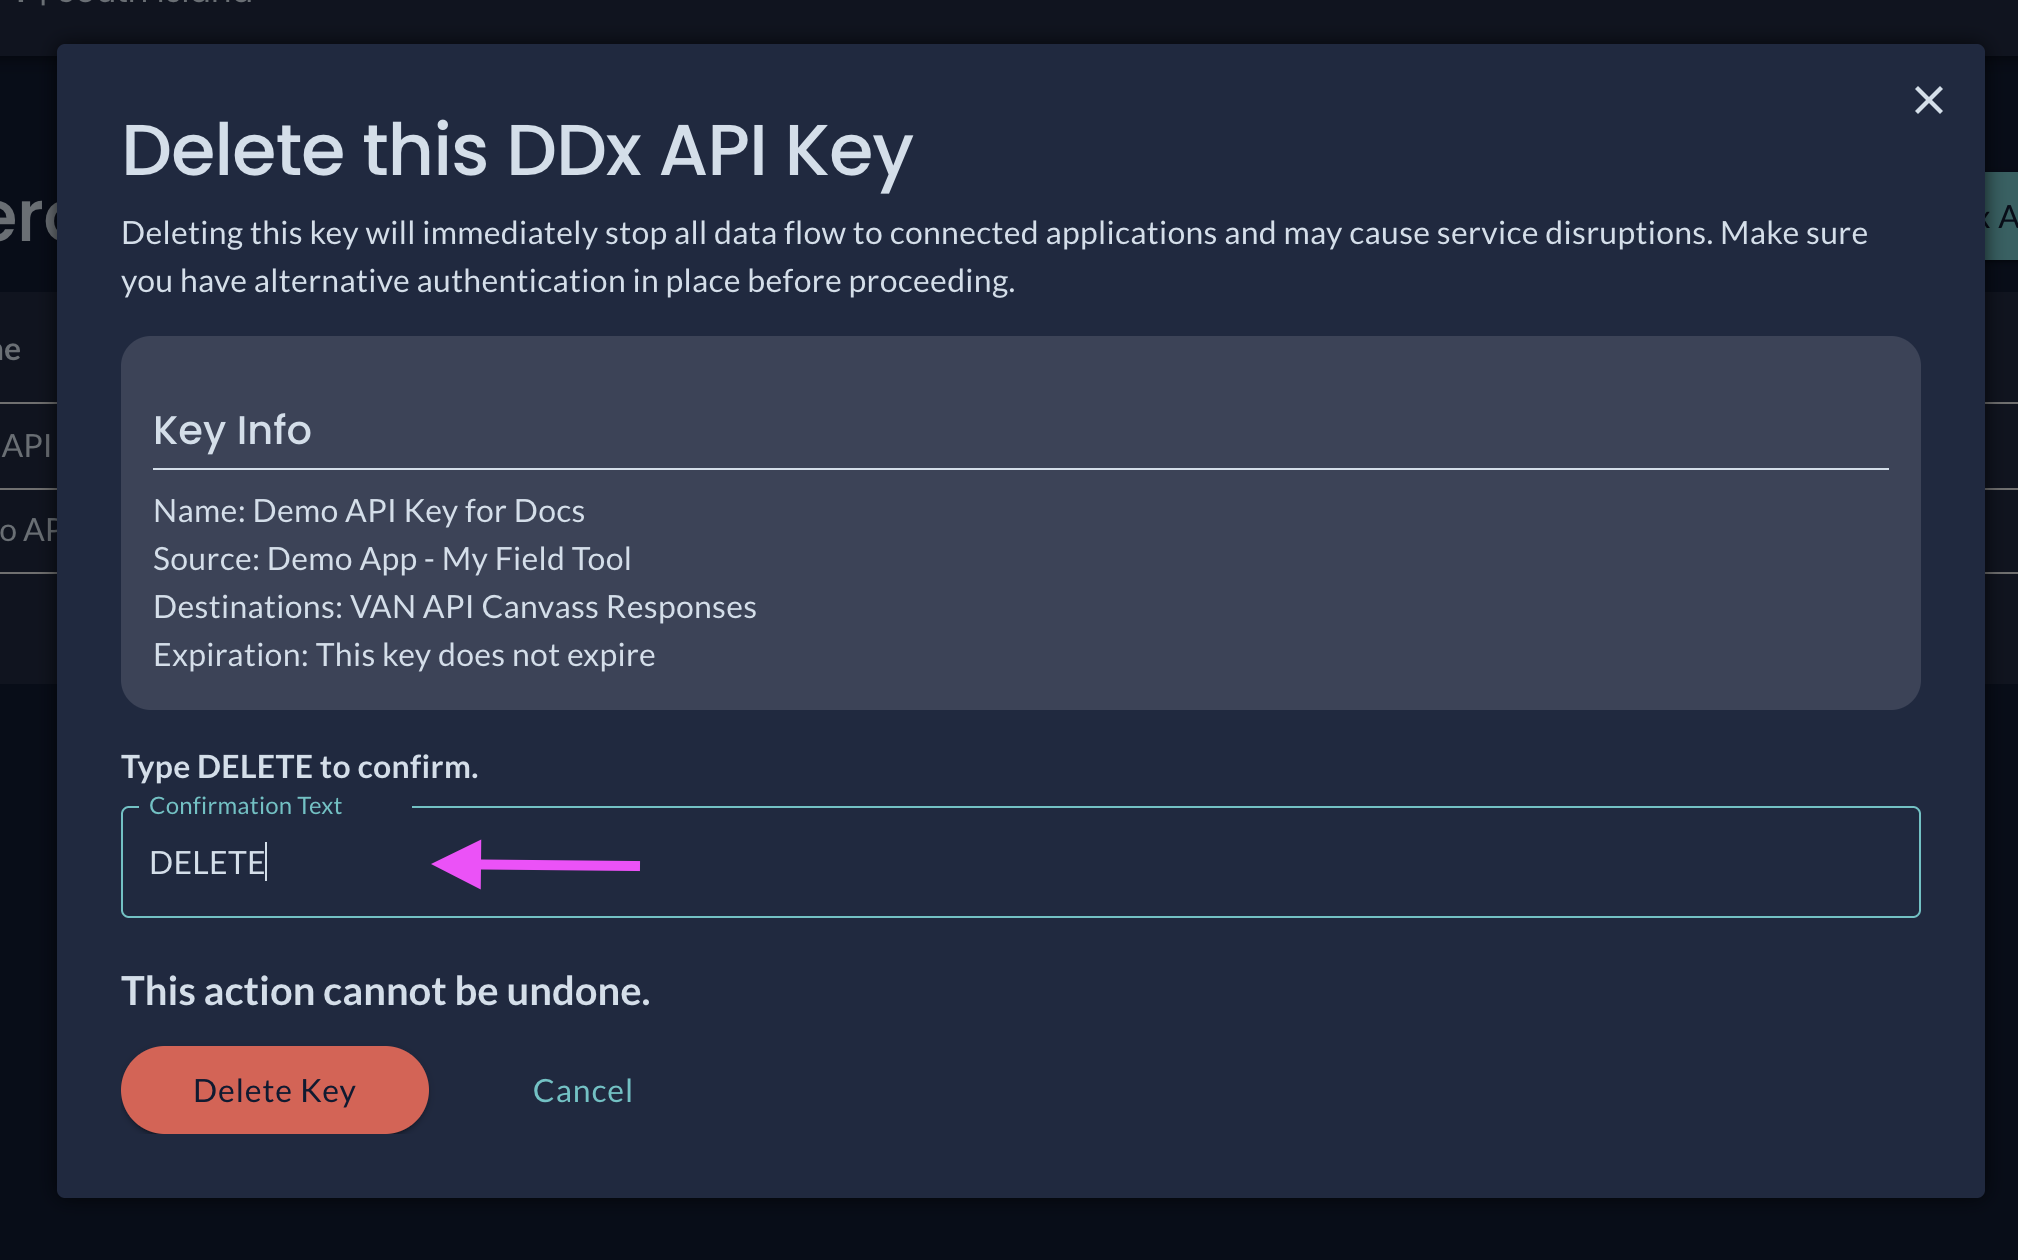
You must type DELETE to confirm deletion of the API Key. Once deleted, an API Key will no longer have authorization to access the Interactions API.